
.png)
It’s hard to believe that it’s already been one year since we moved into our 1960s side split fixer-upper. This house started as a blank canvas filled with dated features and endless potential.
Our vision was to turn it into a home that felt more like "us"—neutral, organic, modern, and practical for our family. Now, we’re looking back at how far we’ve come and all the changes we've made to turn this house into a true home.
In this post, we’ll take you through the before and after of some of the major transformations, including DIY projects, budget-friendly upgrades, and the little details that have made all the difference. From refinishing our hardwood floors to adding wainscoting, and so much more! Let’s dive into the journey so far!
1. The Living Room: Creating a Warm, Inviting Space


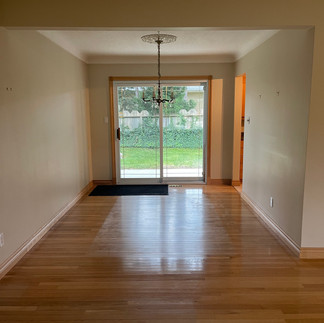
Before: Our main living room was a mix of outdated flooring, beige walls, and heavy drapes. It felt dark, cramped, and wasn’t a space we wanted to spend much time in. We knew this room would become the heart of our home, so we wanted to make it feel fresh and inviting.


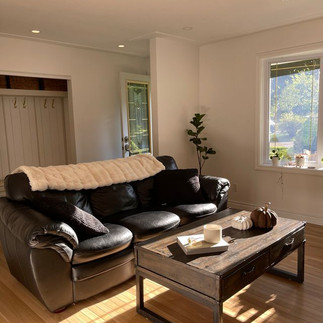
After: Today, the living room is light, airy, and minimal. We refinished the hardwood floors ourselves, painted the whole interior a nice bright and airy colour, and updated the old light fixtures and added recessed lighting!
To make the space more modern, we updated some of our furniture, including this DIY sofa console table, and added new accent chairs that brought a modern, organic touch to the space, while still keeping things simple!


The key was keeping the decor neutral but adding textures—like cozy throws, and natural wood accents—to create warmth. We still have plans to bring in curtains and an area rug when we find the right ones (remember: home takes time!). It’s become the perfect place to relax, entertain, and enjoy family time.
2. The Dining Room: From Drab to Elegant


Before: The dining room was a dated, formal space that felt out of sync with the rest of the house. The matchy-matchy furniture set that was way too big for the space had to go, and we wanted something that felt modern but timeless.

After: We gave this room a complete refresh by adding wainscoting to the walls, which instantly elevated the space and gave it a more formal, elegant feel. We kept our existing dining table (former office table) but refinished it to match the lighter, organic vibe we wanted. New modern dining chairs and accent seating completed the look. Now, the dining room feels cohesive with the rest of the house while still offering a space to gather for meals and special occasions.


3. The Entryway: A Functional Mudroom Makeover


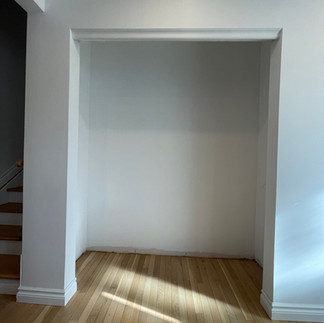


Before: Our entryway was a cramped closet that didn’t offer much function. With two kids, we needed more storage and organization, but we didn’t want to sacrifice style. When we first walked through the house, I knew this was one day going to be our pretty and practical mudroom!

After: We transformed the old entryway closet into a mini mudroom that feels both practical and beautiful. By adding hooks, a bench, baskets, and drawers, we created a space where shoes, coats, and bags have a designated spot. The result is a tidy, organized entry that welcomes us home in style every day. Who says your house can't be both pretty and practical with kids?
4. The Guest Bedroom: Minimal, Cozy, and Budget-Friendly


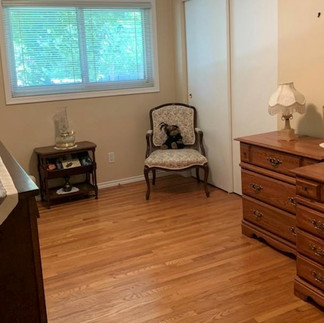

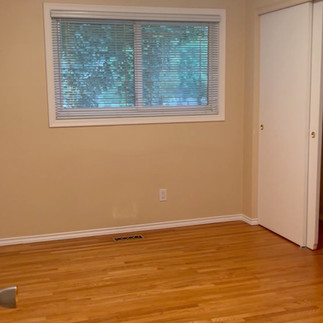
Before: This room was previously used as an office, but we needed it to function as a guest bedroom. The walls were bare, and the space felt cold and uninviting.


After: We designed this room with a minimalist approach, keeping the decor simple but impactful. A budget-friendly upholstered boucle bed, cozy affordable bedding, and neutral tones turned it into a peaceful retreat for guests. We shopped our home for decor items to keep the costs down. The result? A calming space that feels warm and welcoming for anyone who stays.
5. The Primary Bedroom: A Relaxing Retreat


Before: Our primary bedroom was anything but cozy. The space felt dated, with the red oak hardwood floors, lackluster lighting, and no cohesive design. We wanted to create a relaxing retreat where we could truly unwind at the end of the day.


After: We gave this room a complete transformation. We focused on neutral tones with lots of organic textures to create a calm, soothing space. We kept all of our matchy matchy furniture (for now), as it's just not in the budget to replace! New bedding, affordable curtains and cozy accents like throws and pillows made the room feel instantly more comfortable and cohesive. The transformation was budget-friendly but impactful, making the primary bedroom a peaceful and inviting space.
6. DIY Projects That Made an Impact
This house has seen its fair share of DIY projects over the past year. Some of the biggest game-changers include:
Removing Popcorn Ceilings: This was one of the first projects we tackled, and while it was labor-intensive, it completely transformed the look of our home. The smooth ceilings make every room feel taller and more polished. You can read more on how to removed the popcorn ceilings here.
Painting and Refinishing Floors: From sanding down hardwood floors to adding fresh coats of paint throughout the house, these updates gave each space a clean, modern feel. Read more on this DIY project here.
Replacing Old and Dated Light Fixtures: One of the simplest yet most impactful changes was swapping out old, outdated light fixtures for modern, sleek ones. The new fixtures immediately freshened up the look of each room, adding a touch of style and sophistication without breaking the bank.
Installing Recessed Lighting: In rooms like the living room, entryway and primary bedroom we decided to install dimmable recessed lighting to create a brighter, more open atmosphere. This not only improved the functionality of the space, especially in the evenings, but also helped achieve a more modern and streamlined look.
Wall Moulding: We added custom wall moulding to the dining, as well as shiplap in the entryway to add character and create a more refined aesthetic. I have more accent walls that I'd love to tackle one day! I love how they elevate the space and again add that character to an older home.


What’s Next?
While we’ve made a ton of progress this year, there’s still a lot more on our to-do list. Some upcoming projects include:
A complete kitchen renovation
Adding custom built in shelving in our living room
A garage makeover with more organization
Adding more accent walls
Tackling the basement rec room / play room
Bathroom upgrades
Adding in more simple decor like curtains, area rugs, etc.
As we continue to update and transform our home, we’re excited to share more DIY projects, design tips, and budget-friendly hacks that help create a home we love.

Final Thoughts
Transforming our 1960s fixer-upper has been a journey, but seeing the house evolve over the past year has made all the hard work worth it. It’s no longer just a house—it’s our home. A place that reflects our style, meets our needs, and brings us joy every day.
Thank you for following along with our “House to Home” series! Stay tuned for more updates as we continue turning this fixer-upper into our dream home.
コメント