
.png)
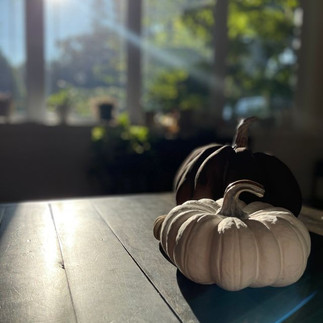
As fall approaches, many of us are excited to bring a bit of autumn charm into our homes. One of my favorite ways to add cozy, seasonal decor is with pumpkins! This year, I decided to give a modern twist to the classic fall decor by creating DIY textured pumpkins. These pumpkins are an affordable, easy-to-make craft that adds a stylish and organic feel to any space, perfect for those of us who love neutral, simple decor.
Follow along as I show you step-by-step how to create these stunning textured pumpkins for your home! Prefer to watch it? Here's the video:
Materials You’ll Need:
Plastic or foam pumpkins (you can find these at most dollar stores or craft stores). Personally, I love Hobby Lobby as their stems look really nice. *Pay attention to those stems! Don't get the ones that look cheap and like plastic!
Acrylic Paint in neutral fall colors (cream, beige, gray, or your preferred tones).
Baking Soda
Paintbrushes
Drop cloth, cardboard box, or newspaper (to protect your work surface)

Step 1: Prep Your Pumpkins
Start by prepping your pumpkins. Wipe off any dust or residue with a damp cloth, and let them dry.


Step 2: Mix the Baking Soda Paint
To achieve that beautiful textured effect, we’ll be mixing acrylic paint with baking soda. The baking soda gives the paint a thicker, gritty texture that will dry with a stone-like, matte finish.
How to Mix the Paint:
Pour your chosen acrylic paint into a small container, or keep it simple by putting it directly on your cardboard box!
Add baking soda to the paint (roughly 1 tablespoon of baking soda for every 1 cup of paint).
Stir the mixture until it becomes thick and has a whipped consistency. You can add more baking soda if you want a thicker, more textured look.
Tip: The more baking soda you add, the more texture your pumpkins will have. Play around with the ratio until you get the texture you like.

Step 3: Paint Your Pumpkins
Once your pumpkins are dry (and sanded, if desired), it’s time to paint! Choose neutral fall colors like soft creams, beiges, and light grays for a chic, modern look. For a more traditional fall vibe, you can opt for muted oranges, browns and rust tones.
Using a paintbrush, apply a thin coat of paint over the textured surface. Depending on the look you’re going for, you might want to do two coats to achieve full coverage.
If you’re feeling creative, try blending two colors together for a more dimensional effect. For example, start with a beige base and lightly brush over with a cream color to highlight the texture. You can also use a lighter colour in the crevices of the pumpkins to make it pop and add some dimension.
Step 4: Let Your Pumpkins Dry
After painting, let your pumpkins dry completely. This can take anywhere from a few hours to overnight, depending on the paint you used. Make sure you place them on a drop cloth or newspaper to avoid any mess.

Step 5: Add a Second Coat (Optional)
If you want your pumpkins to have an extra-textured look, you can apply a second coat of the baking soda paint mixture. This will build up the texture and give your pumpkins an even more pronounced stone-like appearance.
Step 6: Style and Display!
Once your pumpkins are fully dry, they’re ready to display! These DIY textured pumpkins look beautiful in any fall setup. Arrange them on your mantel, console table, coffee table, sofa table, or as part of a simple fall tablescape. Because of their neutral tones and organic texture, they seamlessly fit into almost any style of decor—whether you’re into minimal, rustic, or modern aesthetics.

Bonus Tips for Customizing Your Textured Pumpkins:
Add Gold or Bronze Accents: If you want a more elevated look, try adding metallic details. Use a small brush to paint the pumpkin stems in gold or bronze, or lightly brush some metallic paint over the textured surface for a subtle shimmer.
Use a Whitewash Technique: For a more rustic, farmhouse feel, dilute some white paint with water and lightly brush over your pumpkins. This technique highlights the texture and gives your pumpkins an aged, weathered appearance.
Create Mini Pumpkins: This technique works perfectly for smaller pumpkins too! Create a set of mini textured pumpkins to place around your home or use them as part of a centerpiece.
Why I Love This DIY
The baking soda and acrylic paint technique is one of my favorite fall decor hacks because it’s so affordable, easy to do, and customizable. The textured finish adds a beautiful, natural vibe to any home, and since you can mix your own colours, it fits into almost any decor style.
Whether you prefer neutral, earthy tones or want to experiment with richer fall colors, these textured pumpkins bring a fresh, modern look to traditional fall decor. Plus, this project is beginner-friendly and takes very little time to complete!

Have you tried this DIY textured pumpkin project? Share your results in the comments below or tag me on Instagram—I’d love to see how your pumpkins turned out!
Happy DIYing!
Comments